How to Connect Epson Projector to Soundbar? Easy Method For Quick Setup
Welcome to the world of audio-visual delight! If you’re looking to enhance your home theater experience, connecting your Epson projector to a soundbar is a brilliant way to achieve immersive audio that complements stunning visuals. Whether you’re a movie enthusiast, a passionate gamer, or someone who appreciates high-quality sound, this guide will take you through the process of connecting your Epson projector to a soundbar with ease and finesse.
In the following steps, we’ll explore the necessary equipment, locate the essential ports, and establish a seamless connection between your Epson projector and soundbar. Get ready to elevate your entertainment to new heights as we embark on this audio-visual journey together.
So, let’s dive in and discover the magic of connecting your Epson projector to a soundbar, unlocking the power of exceptional audio performance that will leave you captivated and immersed in a world of cinematic splendor.
Gather the necessary equipment
What We Need?
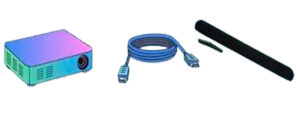
Before we begin, ensure that you have the following items at hand:
- Epson projector: Check!
- Soundbar: Check!
HDMI cable
The bridge will transmit both video and audio signals between your devices.
Optical audio cable (optional): An alternative to HDMI, if your projector and soundbar have optical audio ports.
Locate the ports
Find the HDMI or optical audio ports on your Epson projector and soundbar. These ports are usually labeled, making it easier to identify them. In case you’re unsure, refer to the user manuals for guidance. Once you’ve located the ports, you’re ready for the next step.
Connect the HDMI cable
Take one end of the HDMI cable and connect it to the HDMI output port on your Epson projector. Ensure that it is securely plugged in. Now, connect the other end of the HDMI cable to the HDMI input port on your soundbar. Voila! You have successfully established the connection.
Connect using an optical audio cable
If your Epson projector and soundbar have optical audio ports and you prefer to use this connection method, proceed as follows. Take one end of the optical audio cable and plug it into the optical audio output port on your Epson projector. Then, connect the other end of the optical audio cable to the optical audio input port on your soundbar. Congratulations! You’ve established the optical audio connection.
Adjust settings
Now that your Epson projector and soundbar are connected, it’s time to configure the audio settings. Access the settings menu on your projector and navigate to the audio settings section. Select the audio output source as HDMI or optical audio, depending on the type of connection you made. Make sure the volume level is set appropriately on both the projector and soundbar to ensure an optimal audio experience.
Test and enjoy
The moment of truth has arrived! Turn on your Epson projector, followed by your soundbar. Start playing your favorite movie, TV show, or game, and relish the rich, immersive sound filling your space. Adjust the soundbar settings as desired to achieve the perfect balance between dialogues, sound effects, and background music.
Related: How to Connect Android TV Box to Projector? Step By Step Guide
Wireless Vs Wire Connection
When it comes to connecting devices, such as projectors, soundbars, or any other audio-visual equipment, you often have the option to choose between a wireless or wired connection. Both methods have their unique advantages and considerations, so let’s embark on a journey to explore the world of wireless and wired connections.
Wireless Connections
Imagine a world without tangled cables and the freedom to move around effortlessly. That’s precisely what wireless connections offer. The following points are important to keep in mind:
- Convenience and Mobility: One of the most significant advantages of wireless connections is the freedom of movement they provide. Without the constraints of physical cables, you can place your devices anywhere within the range of the wireless signal. This flexibility allows for a clutter-free environment and easy repositioning of devices as needed.
- Easy Setup: Wireless connections typically require minimal setup. Once the devices are within range and properly configured, they can communicate with each other seamlessly. This user-friendly setup is especially beneficial for those who prefer a hassle-free experience.
- Aesthetics: With wireless connections, you can maintain a clean and visually appealing setup without the clutter of cables. This can be particularly important for home theaters or living rooms where you want to create a sleek and modern ambiance.
- Multiple Device Connectivity: Wireless connections often allow for multiple devices to connect simultaneously. This can be advantageous in scenarios where you want to stream audio or video from different sources to a single output device, such as a soundbar or projector.
Wired Connections
While wireless connections offer convenience, wired connections have their own set of strengths. Let’s explore some reasons why wired connections might be preferable:
- Stability and Reliability: Wired connections are known for their stability and reliability. Unlike wireless connections, they are not susceptible to interference from other devices or environmental factors. This makes them a preferred choice in situations where a consistent and uninterrupted connection is crucial, such as in professional settings or when dealing with high-quality audio or video streams.
- Higher Bandwidth: Wired connections often provide higher bandwidth compared to wireless connections. This translates to faster data transfer rates, which can be advantageous for applications that require large amounts of data to be transmitted, like high-resolution video streaming or gaming.
- Security: It is generally considered safer to connect to a wireless network via a wired connection as opposed to a wireless connection. Since the data is transmitted through physical cables, the chances of unauthorized access or interception are relatively low.
- Compatibility: Wired connections, such as HDMI or optical cables, have been widely adopted in the audio-visual industry. This means that most devices, including projectors and soundbars, are equipped with the necessary ports to support wired connections. Compatibility issues are less likely to arise when using standard cables.
Use the Audio Out of the Source Media Device
When setting up your audio-visual system, one useful technique is to utilize the “Audio Out” feature of your source media device. This feature allows you to extract the audio signal directly from the device and connect it to an external audio system, such as a soundbar or amplifier. By doing so, you can enhance the audio quality and enjoy a more immersive experience. Let’s dive deeper into the process of utilizing the Audio Out of your source media device.
Identify the Audio Out options:
Begin by examining your source media device, which could be a TV, DVD player, gaming console, or even a streaming device like a set-top box. Look for the Audio Out ports, which may be labeled as “Audio Out,” “Audio Output,” or similar terms. Common types of Audio Out ports include HDMI ARC (Audio Return Channel), optical audio (TOSLINK), or RCA (red and white) connectors.
Choose the appropriate cable:
Once you’ve identified the Audio Out port on your source media device, select the appropriate cable to connect it to your external audio system. The type of cable will depend on the available ports on both your source media device and the audio system. Here are a few common options:
- HDMI ARC: If your source media device and audio system both support HDMI ARC, use an HDMI cable to establish the connection. In HDMI ARC, a single cable can transmit audio as well as video signals.
- Optical audio (TOSLINK): If your source media device has an optical audio output and your audio system has an optical audio input, use an optical audio cable to establish the connection. Digital audio signals are transmitted using this cable type.
- RCA cables: If your source media device and audio system have RCA ports, you can use RCA cables with red and white connectors to establish the connection. These cables transmit analog audio signals.
- Connect the devices: With the appropriate cable in hand, connect one end to the Audio Out port of your source media device and the other end to the corresponding Audio In port on your external audio system. Ensure a secure and snug connection to avoid audio interruptions.
- Adjust audio settings: Once the devices are connected, access the audio settings on your source media device. Navigate to the audio output settings and select the appropriate option to ensure that the audio is routed through the Audio Out port. Depending on the device, you may need to enable features like HDMI ARC or select the optical audio output.
- Test and optimize: Turn on your source media device and audio system, and play some content to test the audio output. Adjust the volume levels on both devices to achieve the desired sound balance. Experiment with additional audio settings on your source media device and audio system, such as equalizer settings, to further optimize the audio quality according to your preferences. By utilizing the Audio Out feature of your source media device, you can tap into the full potential of your audio system and elevate your audio-visual experience. Whether you’re enjoying movies, gaming, or simply listening to music, this method allows you to unlock rich, immersive sound that complements the visual elements perfectly. So, grab your cables, connect the devices, and embark on a journey of audio bliss!
FAQs About How to Connect Epson Projector to Soundbar
Can I connect my Epson projector to a soundbar?
Yes, you can connect your Epson projector to a soundbar to enhance the audio quality of your viewing experience.
What type of cable do I need to connect the Epson projector to the soundbar?
You’ll typically need an audio cable, such as an HDMI ARC (Audio Return Channel) cable, an optical cable, or a 3.5mm auxiliary cable, depending on the available ports on both the projector and the soundbar.
How do I connect the Epson projector to the soundbar using an HDMI ARC cable?
Connect one end of the HDMI ARC cable to the HDMI ARC port on the projector and the other end to the HDMI ARC port on the soundbar. Make sure to enable HDMI ARC on both devices’ settings.
Can I use an optical cable to connect the Epson projector to the soundbar?
Yes, if your projector and soundbar have optical audio ports, you can connect them using an optical cable. Plug one end into the projector’s optical port and the other end into the soundbar’s optical input.
Is it possible to connect wirelessly?
Some projectors and soundbars support wireless connectivity options like Bluetooth. Check the user manuals of both devices to see if they have this feature.
How do I adjust the audio settings after connecting the projector to the soundbar?
Use the projector’s remote control to access the audio settings. You may need to switch the audio output source from the projector’s built-in speakers to the connected soundbar.
What do I do if there’s no sound coming from the soundbar?
Ensure that the audio cable is securely connected and that both the projector and soundbar are powered on. Also, verify that the correct audio input source is selected on the soundbar.
Will my Android TV Box automatically adjust to the projector’s resolution?
Android TV Boxes typically adjust their output resolution to match the capabilities of the connected display. However, in some cases, you might need to manually set the resolution in the Android TV Box settings for the best display output.
Conclusion:
Connecting your Epson projector to a soundbar allows you to enjoy a harmonious blend of stunning visuals and superior audio quality. Whether you’re watching movies, playing games, or hosting a multimedia presentation, this straightforward process enriches your entertainment and creates a truly immersive audio-visual experience. So, sit back, relax, and indulge in the cinematic delight that awaits you.